
 Arizona Diamondbacks
 Atlanta Braves
 Baltimore Orioles
 Boston Red Sox
 Chicago Cubs
 Chicago White Sox
 Cincinnati Reds
 Cleveland Guardians
 Colorado Rockies
 Detroit Tigers
 Houston Astros
 Kansas City Royals
 Los Angeles Angels
 Los Angeles Dodgers
 Miami Marlins
 Milwaukee Brewers
 Minnesota Twins
 New York Mets
 New York Yankees
 Oakland Athletics
 Philadelphia Phillies
 Pittsburgh Pirates
 San Diego Padres
 San Francisco Giants
 Seattle Mariners
 St. Louis Cardinals
 Tampa Bay Rays
 Texas Rangers
 Toronto Blue Jays
 Washington Nationals
 Atlanta Hawks
 Boston Celtics
 Brooklyn Nets
 Charlotte Hornets
 Chicago Bulls
 Cleveland Cavaliers
 Dallas Mavericks
 Denver Nuggets
 Detroit Pistons
 Golden State Warriors
 Houston Rockets
 Indiana Pacers
 Los Angeles Clippers
 Los Angeles Lakers
 Memphis Grizzlies
 Miami Heat
 Milwaukee Bucks
 Minnesota Timberwolves
 New Orleans Pelicans
 New York Knicks
 Oklahoma City Thunder
 Orlando Magic
 Philadelphia 76ers
 Phoenix Sun
 Portland Trailblazers
 Sacramento Kings
 San Antonio Spurs
 Toronto Raptors
 Utah Jazz
 Washington Wizards
 Arizona Cardinals
 Atlanta Falcons
 Baltimore Ravens
 Buffalo Bills
 Carolina Panthers
 Chicago Bears
 Cincinnati Bengals
 Cleveland Browns
 Dallas Cowboys
 Denver Broncos
 Detroit Lions
 Green Bay Packers
 Houston Texans
 Indianapolis Colts
 Jacksonville Jaguars
 Kansas City Chiefs
 Las Vegas Raiders
 Los Angeles Chargers
 Los Angeles Rams
 Miami Dolphins
 Minnesota Vikings
 New England Patriots
 New Orleans Saints
 New York Giants
 New York Jets
 Philadelphia Eagles
 Pittsburgh Steelers
 San Francisco 49ers
 Seattle Seahawks
 Tampa Bay Buccaneers
 Tennessee Titans
 Washington Commanders
 Anaheim Ducks
 Arizona Coyotes
 Boston Bruins
 Buffalo Sabres
 Calgary Flames
 Carolina Hurricanes
 Chicago Blackhawks
 Colorado Avalanche
 Columbus Blue Jackets
 Dallas Stars
 Detroit Red Wings
 Edmonton Oilers
 Florida Panthers
 Los Angeles Kings
 Minnesota Wild
 Montreal Canadiens
 Nashville Predators
 New Jersey Devils
 New York Islanders
 New York Rangers
 Ottawa Senators
 Philadelphia Flyers
 Pittsburgh Penguins
 San Jose Sharks
 Seattle Kraken
 St. Louis Blues
 Tampa Bay Lightning
 Toronto Maple Leafs
 Vancouver Canucks
 Vegas Golden Knights
 Washington Capitals
 Winnipeg Jets
Guides
Beginner’s Guide to Making Embroidered Patches
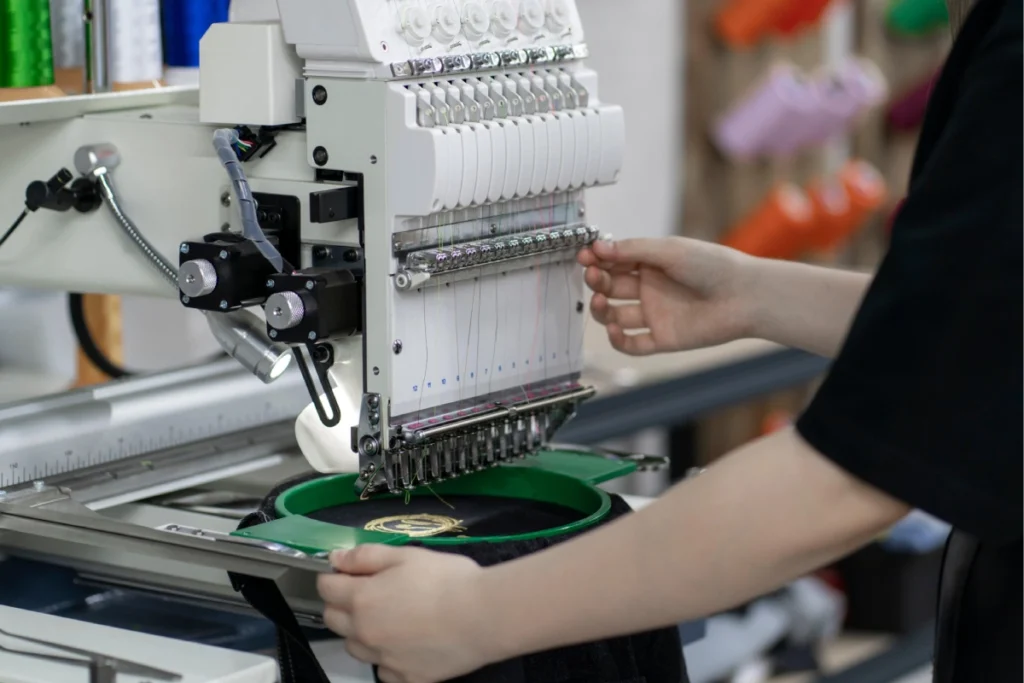
Embroidered patches are one of the easiest ways to personalize clothing, backpacks, hats, uniforms, and other fabric items. Whether you’re creating patches for a hobby, a business, or a custom project, learning the process is simpler than you might think. You can make patches entirely by hand for a handcrafted look or use an embroidery machine for faster, more consistent results.
This guide explains the materials you’ll need and the steps for making machine-embroidered, hand-embroidered, and iron-on patches.
What You’ll Need
Before getting started, gather these basic supplies:
- Embroidery thread
- Base fabric (felt, twill, canvas, or denim)
- Embroidery hoop (for hand embroidery)
- Embroidery needle
- Embroidery machine (optional)
- Embroidery stabilizer
- Sharp fabric scissors
- Patch backing (iron-on, sew-on, or hook-and-loop)
- Fabric marker or transfer paper
- Heat press or household iron (for iron-on patches)
How to Make Embroidered Patches with an Embroidery Machine
Machine embroidery is the preferred method for creating professional-quality patches, especially if you plan to produce multiple pieces. It delivers clean stitching, consistent designs, and saves a significant amount of time.
Step 1: Create or Digitize Your Design
Start by creating your artwork in embroidery software. If you already have a logo or illustration, convert it into an embroidery file using digitizing software or a professional digitizing service.
Step 2: Prepare the Fabric
Place your chosen fabric together with embroidery stabilizer inside the hoop. Make sure the material is stretched evenly to prevent wrinkles during stitching.
Step 3: Set Up the Machine
Load the embroidery file into your machine and thread it with the required colors. Double-check thread tension before starting.
Step 4: Stitch the Patch
Run the embroidery machine and allow it to complete the design. Modern machines automatically change stitch directions and colors for precise results.
Step 5: Cut the Patch
Once embroidery is finished, remove the fabric from the hoop and trim around the design. Leave a narrow border if you plan to add a satin stitch edge.
Step 6: Apply the Backing
Finish the patch by attaching your preferred backing:
- Iron-on adhesive
- Sew-on backing
- Hook-and-loop (Velcro)
- Peel-and-stick adhesive
Your embroidered patch is now ready to use.
How to Make Embroidered Patches by Hand
Hand embroidery is perfect for anyone who enjoys traditional crafting. Every patch has its own unique character, making this method popular for personalized gifts and one-of-a-kind designs.
Step 1: Prepare the Fabric
Cut a piece of sturdy fabric slightly larger than your intended patch. Secure it tightly inside an embroidery hoop.
Step 2: Transfer the Design
Sketch your design directly onto the fabric with a washable fabric pen or transfer it using tracing or transfer paper.
Step 3: Stitch the Design
Use embroidery floss to fill your design with different stitches.
Common stitches include:
- Backstitch for outlines
- Satin stitch for solid areas
- Split stitch for curves
- French knots for decorative details
- Chain stitch for borders
Work slowly and keep your stitches even for the best appearance.
Step 4: Trim Around the Design
When the embroidery is complete, carefully cut around the design, leaving a small fabric margin to maintain the patch shape.
Step 5: Finish the Patch
Attach a backing depending on how you plan to use it:
- Sew-on for durability
- Iron-on for convenience
- Adhesive backing for temporary use
How to Make Iron-On Embroidered Patches
Iron-on patches combine decorative embroidery with heat-activated adhesive, allowing them to be applied without sewing.
Step 1: Complete the Embroidery
Create your embroidered patch using either hand embroidery or an embroidery machine.
Step 2: Attach Heat-Activated Backing
Place iron-on adhesive on the back of the patch. Follow the manufacturer’s instructions for temperature and pressing time to ensure proper bonding.
Step 3: Trim the Edges
Cut neatly around the finished design. Rounded corners generally last longer and resist peeling better than sharp points.
Step 4: Apply the Patch
Position the patch on your garment.
Cover it with a thin pressing cloth and apply firm heat using an iron for approximately 20–30 seconds. Allow it to cool completely before checking adhesion.
For workwear or frequently washed clothing, sewing around the border after ironing provides additional durability.
Best Fabrics for Embroidered Patches
Choosing the right fabric helps your patches last longer and maintain their shape.
- Twill: Most popular for professional patches
- Felt: Easy to cut and ideal for handmade projects
- Canvas: Durable with a textured finish
- Denim: Great for rugged or vintage-style patches
Choosing the Right Patch Backing
Different backings work best for different applications.
| Backing Type | Best For |
|---|---|
| Iron-on | Jackets, backpacks, casual clothing |
| Sew-on | Uniforms, heavy-use garments |
| Hook-and-loop | Tactical gear and interchangeable patches |
| Adhesive | Temporary displays and crafts |
Tips for Better Embroidered Patches
For cleaner, longer-lasting patches:
- Use high-quality embroidery thread.
- Keep fabric tightly hooped while stitching.
- Choose sharp embroidery scissors for trimming.
- Test iron-on backing on scrap fabric first.
- Seal or satin-stitch patch edges to reduce fraying.
- Store finished patches flat and dry until use.
Final Thoughts
Making embroidered patches is a rewarding project whether you prefer traditional hand stitching or the speed of an embroidery machine. Machine embroidery offers precision and efficiency, while hand embroidery provides a unique handcrafted appearance. Adding iron-on, sew-on, or hook-and-loop backing completes the patch and makes it easy to attach to your favorite clothing or accessories.
With the right materials, a little patience, and consistent practice, you can create durable embroidered patches that showcase your creativity and stand up to everyday use.

Really enjoyed this guide. I’ve been wanting to try making my own patches but always assumed it was more complicated than it actually is.